


Salesforce Connected App #
How to Create a Connected App? #
- Login to your Salesforce account.
- Switch to the Salesforce Classic mode from the profile menu, and then go to the Setup page.
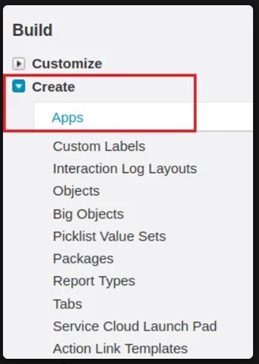
- From the left pane, under Build section go to Create > Apps.
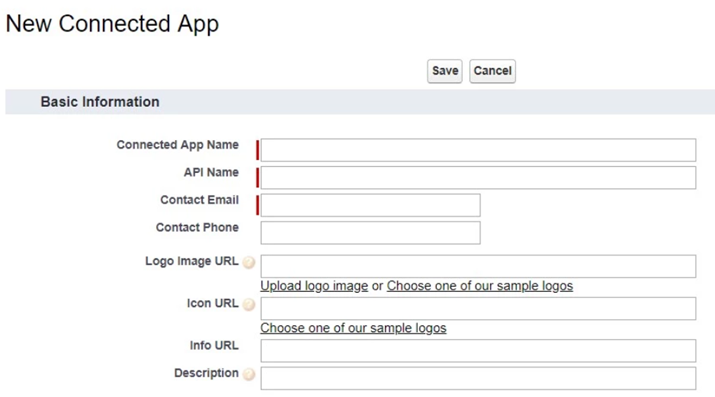
Scroll down and click on the New button under Connected apps.
- Check the Enable OAuth Settings checkbox under API (Enable OAuth Settings) section and you will be shown more options to configure.
- Enter the Callback URL https://<clientname>.successfulchannels.com/salesforceIntegration/callback
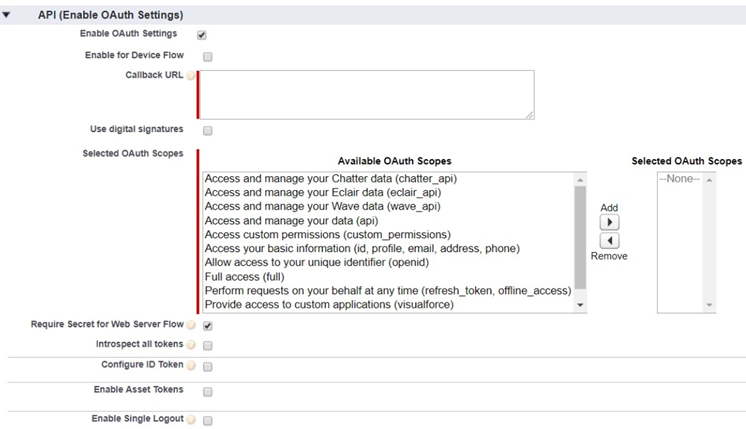
- Select the Scopes as required and save the settings.
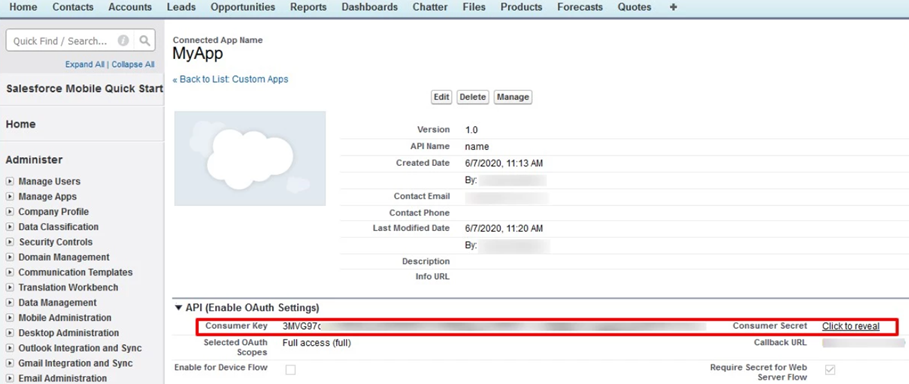
- You will be taken to the Application Management page. Here, you will find Consumer key (Client ID) and Consumer Secret (Client Secret). (Share this detail with Successful Channels)
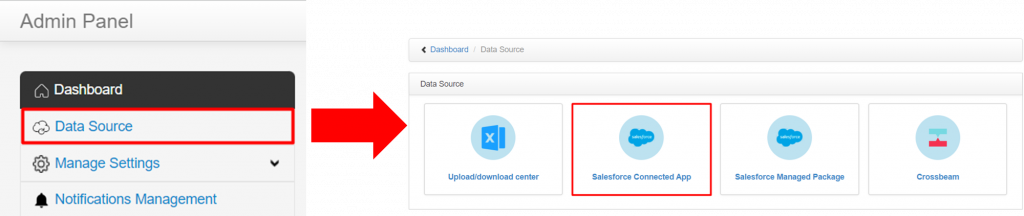
How to Authorize Successful Channels? #
- Login to your Admin.
- From the left pane, click on Data Source > Salesforce Connected App.
- Enter the details like Client Id, Client Secret, Client URI, Redirect URI under “Authenticate” tab.
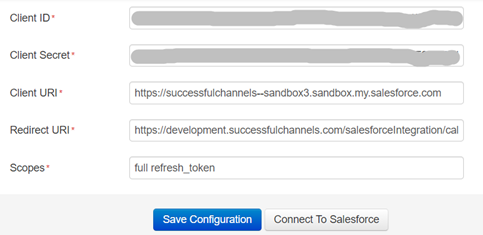
- Click on “Save Configuration” or “Connect to Salesforce”
- Connection Successful.
Object and Field Mapping Controls? #
- Login to your Admin.
- From the left pane, under Manage Salesforce section go to Connected App.
- Click on the tab “Object & Field Mappings” tab.
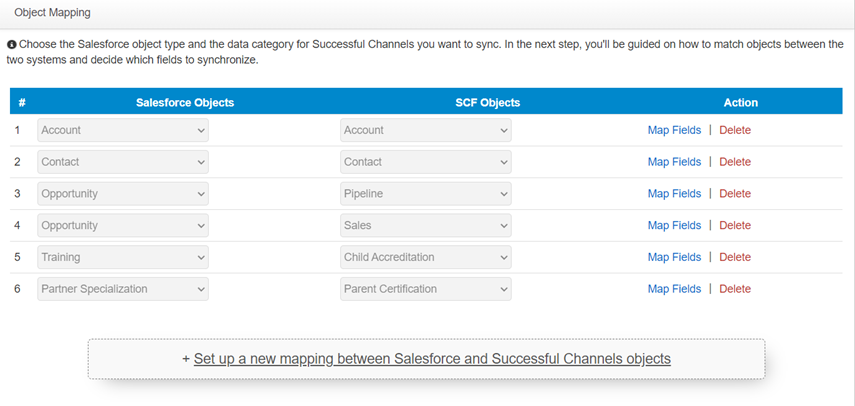
- To configure any new object mapping click on “Set up a new mapping between Salesforce and Successful Channels Objects.”
- 1st column displays the list of available objects of Salesforce.
- 2nd column display the list of available data categories of Successful Channels.
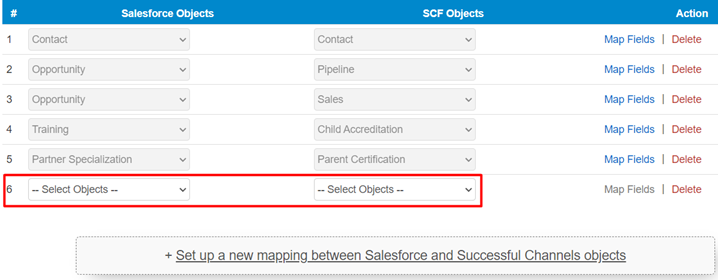
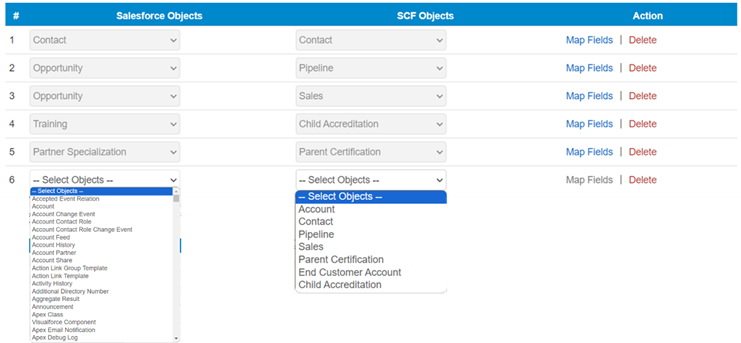
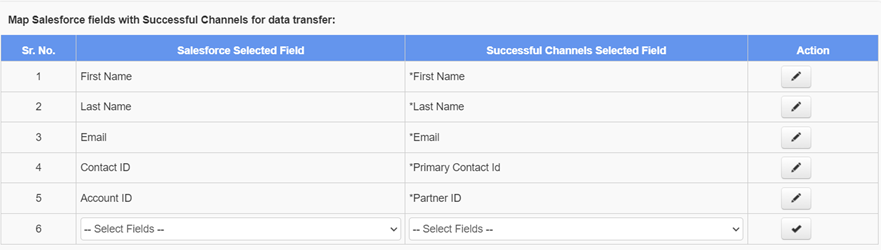
- After selecting required objects from both the column click on “Map Fields”
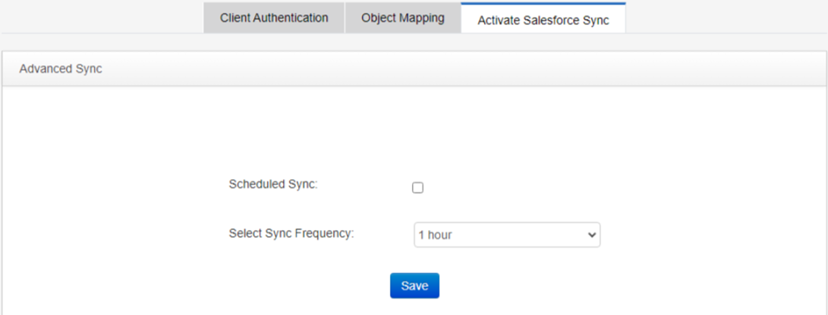
How to Schedule Data Sync Frequency? #
- Login to your Admin.
- From the left pane, under Manage Salesforce section go to Connected App.
- Click on the tab “Activate Salesforce Sync” tab.
- Activate Scheduled Sync
- Set Sync Frequency (1, 3, 6 and 10) in hours.
- Click “Save”
Managed Package Vs Connected App? #
| Managed Package | Connected App |
| Take at least 45 minutes to configure with all the settings. | Ease of Configuration |
| APEX jobs execution in client SFDC ORG | No Apex Jobs |
| Client Storage Limit Utilized. As data is stored in Successful Channels Custom Objects. | No Client SFDC Storage Utilization |
| IT Support Required More Frequently for any update related to settings. | IT Support for Connected App Integration |
| No, Flexibility to configure custom filters to sync data. Only pre-defined filters get applied. | Flexibility to configure custom filters to sync data. |
| Always Need to Update Filters on Adding New Account(s). | No need to update the filters. New accounts can be added directly in Successful Channels. |
| Batch Processing Limit (1500 Records) | Reliable Batch Processing (2000 Records) |
| Frequent API Calls for Bulk Data Retrieval | Reduced API Calls for Bulk data Retrieval |
